
Connecting a document camera, especially the Aver F17 model, to your laptop can transform presentations. Whether using it as a document camera for teachers or showcasing visuals for students, the setup is straightforward. Many professionals prefer tools like the Elmo or Ipevo, but the Aver document camera stands out for its simplicity and quality.
In this guide, you’ll discover the step-by-step process to connect the Aver F17 effortlessly. Stay tuned to enhance your teaching or presentations using one of today’s most reliable tools.
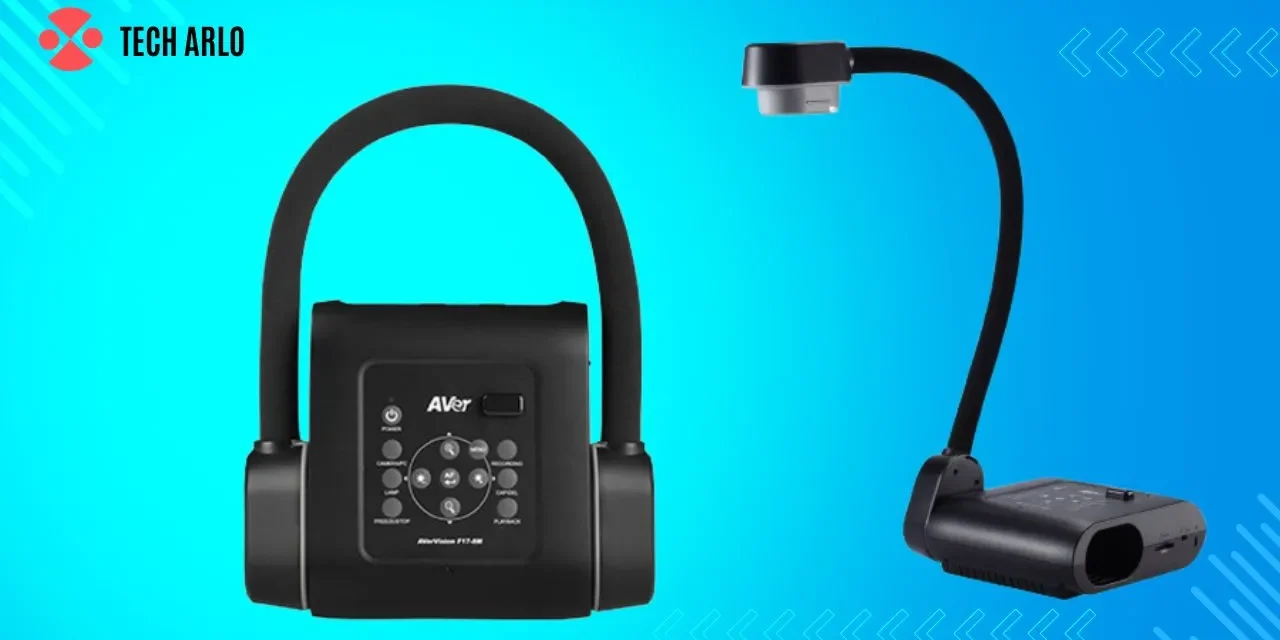
What is the Aver F17 Document Camera?

The Aver F17 document camera is a versatile tool for classrooms and presentations. Known as one of the best camera models, it delivers exceptional image clarity and functionality. It integrates seamlessly with devices like an Epson camera or a document camera projector for enhanced visual experiences.
This camera is ideal for educators and professionals seeking a reliable teaching companion. Users can efficiently capture, project, and save content with the right camera app. Its compatibility with multiple devices makes it accessible for offline and online camera use.
The camera price of the Aver offers great value for its features. Whether presenting lessons or demonstrating products, this tool ensures maximum engagement.
What Is a Document Camera?
A document camera is a versatile tool that displays documents or objects digitally. Widely used in education, it’s perfect as a camera for teachers, enhancing classroom interaction. With its high-quality projection, it brings lesson materials to life seamlessly.
Popular models like the Elmo document camera and Ipevo camera are known for their reliability. These cameras connect effortlessly to laptops or projectors, offering convenience and flexibility. The Aver and Epson cameras are also trusted for their sharp image quality.
Whether teaching or presenting, a camera ensures engaging and professional visuals. It’s an indispensable tool for modern education and business environments.
Preparing to Connect the Aver F17 to Your Laptop

Setting up your Aver F17 document camera is simple and efficient. With the right tools, you’ll unlock its full potential for professional use. Here’s how to get started.
1. Gather the Necessary Equipment
Before starting, ensure you have the best camera, HDMI cable, and power adapter. Check your laptop’s compatibility and the camera price to meet your budget. A reliable camera projector may also enhance your setup.
2. Position the Document Camera Properly
Place the camera on a stable surface to capture clear images. Adjust the camera online settings for optimal display. Proper positioning ensures a smooth connection and excellent performance.
3. Install the Required Software
Download the recommended camera app for the F17 model. Installing this app simplifies integration with your laptop. Ensure all drivers are updated for the best results.
4. Connect Cables Securely
Use the HDMI cable to connect the camera to your laptop or projector. Properly inserted cables improve connection stability and enhance your document camera projector experience. Check connections for reliability.
5. Test the Camera’s Functionality
Turn on the camera and verify the display on your laptop or projector. Adjust settings through the camera app to achieve the desired clarity. Testing ensures everything is working perfectly.
Step-by-Step Guide to Connect Aver F17 to Laptop

Connecting the Aver document camera to your laptop is a straightforward process. These simple steps ensure a seamless connection for your presentations or teaching sessions.
1. Gather Required Equipment
Ensure you have your Aver camera, laptop, and cables like USB or VGA. These components are crucial for establishing a smooth connection. Many professionals rely on tools like the Ipevo camera or Elmo camera, but the Aver F17 offers exceptional quality and performance.
2. Connect the Cables
Attach the USB or VGA cable securely from the Aver document camera to your laptop. Make sure the connections are snug to avoid signal issues. This method is common across other models like the Epson camera and the camera projector setups for classrooms and meetings.
3. Power On and Adjust Settings
Turn on the Aver camera and your laptop, then configure display settings. Select the appropriate input source on your laptop to enable the camera display. For additional control, you can use a camera app to fine-tune your visuals effectively.
4. Test the Display Output
Test the setup by projecting an image or document to check the clarity. A high-quality camera for teachers, like the F17, ensures professional-grade visuals. If needed, compare with alternatives like the best camera for your specific needs.
5. Troubleshoot Common Issues
If the connection fails, check cable connections or update laptop drivers. Always ensure your camera and laptop are compatible. You can also explore camera online guides or consult professionals to resolve issues. Investing in the right tools at the correct camera price matters.
How To Set Up a Document Camera?

Setting up a document camera is a quick process to enhance presentations or lessons. Follow these steps to get started with your device, whether it’s for classrooms or offices.
1. Gather Your Equipment
Ensure you have all necessary tools, including the document camera, laptop, and cables. Popular models like the Elmo camera, Ipevo, or Aver camera work seamlessly with most setups. Choosing the best camera ensures a better experience for teaching or professional use.
2. Connect to Your Device
Attach the camera to your laptop or projector using a USB or HDMI cable. Many document cameras for teachers are designed for easy compatibility with devices. Models like the Epson camera also work well with most systems, ensuring smooth connectivity and setup.
3. Install or Update Software
Download and install the necessary camera app or driver for functionality. The Software ensures smooth operation and access to features. Whether using a document camera online or offline, always update your Software for optimal performance.
4. Position the Camera Properly
Place the camera over your materials, ensuring the lens captures everything. Tools like the Aver camera or projector provide sharp visuals when positioned correctly. Adjust lighting to avoid glare for enhanced clarity during use.
5. Test and Troubleshoot
Test the setup by projecting a document and adjusting focus or brightness. If issues arise, consult camera online guides or check for software updates. Knowing the camera price ensures you’ve invested in a high-quality tool.
Read More: WHAT IS THE FIRST LEICA MEDIUM FORMAT CAMERA?
How Does a Document Camera Work?
A document camera captures images of documents or objects and displays them digitally. This tool is a camera for teachers to enhance classroom engagement. Projecting clear visuals transforms traditional teaching methods into dynamic presentations.
The best camera connects easily to laptops or projectors using USB or HDMI cables. Some models include a dedicated camera app for advanced features like zoom and focus. Paired with a document camera projector, it ensures sharp visuals on large screens, perfect for lectures or meetings.
Modern camera online options make it easy to explore features and compatibility. Their affordability and competitive camera price points make them an essential tool. Reliable and versatile, they enhance productivity in both educational and professional settings.
How Much Does a Document Camera Cost?
The price of a document camera varies depending on the model and features. Generally, prices range from affordable options to more advanced models, such as the best camera for professional use. A document camera for teachers offers excellent value in enhancing classroom presentations.
The brand and additional features can also influence the camera price. High-end models may include advanced functions like camera projectors and compatibility with camera apps for easy image sharing. Budget-friendly options offer solid performance for everyday use.
Consider whether you need extra features, like online compatibility or portability when purchasing a camera. You can compare prices and features of document cameras online to find the best deal. It’s important to balance cost and functionality to meet your needs.
Troubleshooting Common Connection Issues

Sometimes, connecting your camera to your laptop or projector can be tricky. However, following these steps can resolve most issues quickly, ensuring you stay productive and avoid disruptions in presentations or lessons.
1. Check Cable Connections
First, ensure all cables are securely connected between the Aver camera and your laptop. Loose connections can lead to signal loss. This step is essential whether you’re using an Elmo document camera, Ipevo document camera, or Epson camera.
2. Update Software and Drivers
Outdated drivers can cause connectivity issues. Make sure your laptop’s software is up to date. Some models, like the best camera options, require specific drivers or apps for seamless operation. Check for camera app updates for the latest features and bug fixes.
3. Verify Display Settings
Incorrect display settings can prevent the camera from showing up on your laptop. Navigate to the display settings on your laptop and adjust as needed. Connect your camera to a document camera projector for better results and check the clarity and output quality.
4. Restart Devices
A simple restart of the camera and laptop can sometimes resolve minor issues. This works well for most models, including the Epson camera. You can also look for troubleshooting guides and cameras online for additional tips.
5. Check for Hardware Malfunctions
If issues persist, check for hardware malfunctions or damage to your camera. Investigate the cables, connectors, and camera lens for defects. Comparing prices for a camera will help you choose the right model at the best camera price for long-term use.
Read More: WHAT IS STEALTH CAMERA?
FAQ’s
How to scan documents with a phone camera
To scan documents with your phone camera, open the camera app. Capture the document clearly, ensuring good lighting and focus. Use a scanning app to enhance the image quality.
How to use the IPEVO document camera
To use the IPEVO document camera, connect it to your laptop via USB. Open the IPEVO Visualizer app and capture or stream your documents or objects in high-quality visuals.
Can I use a webcam as a document camera?
You can use a webcam as a camera by placing it over the document. Adjust the focus and angle to achieve clear visibility and capture high-quality images.
Can you use a document camera without a projector?
Yes, you can use a camera without a projector. Connect it to your computer and use the screen as your display for projected images or documents.
How do I connect the Aver document camera?
Plug the USB cable into your laptop to connect the Aver camera. Open the relevant software or app and use it to capture or display documents.
How do you use a document camera in the classroom?
To use a camera in the classroom, connect it to a laptop or projector. Display documents, books, or other materials for students to view clearly on a screen.
Conclusion
In conclusion, connecting the document camera to your laptop, such as the Aver F17 model, is an easy and efficient way to enhance presentations. Whether you’re using it in the classroom or for professional meetings, this camera provides high-quality visuals and seamless integration.
With tools like the Aver document camera app and various connection methods, such as USB or HDMI, your setup can be done quickly. The F17’s simplicity and exceptional performance make it a top choice for educators and professionals. Proper setup and troubleshooting will ensure a smooth, professional presentation every time.


